Layering and Quilting
Layering
- There are many, many web sites and YouTube videos on layering a quilt. We suggest you do some research if you have never done one before.
- Layering is most easily done at waist height. Two or three 8 foot bi-fold trestles are really useful for this as they are sturdy and fold away. However the floor can be used if that is the only solution.
- As with the quilt top fabric, the backing fabric should be pre-washed. You do not want it to shrink later, or for its colours to run into your quilt top.
- The batting should also be pre-washed. If you read the fine print on its packaging you will find that it can have up to 5% shrinkage; that is 5″ every 100″! Whilst the ‘puffy’ effect this causes can look good with other types of quilt, it does not work well with bargellos. For this reason it is worth checking when you buy your batting whether it can be tumble-dried before being quilted, as it is much easier to get completely dry that way. Note that very few—if any—battings allow you to machine wash before quilting, however we have found that some battings can be machine washed on gentle, and that this makes things much easier. Do some experiments first using a small piece, rather than risk ruining an expensive large piece.
- Lay the ironed backing material (right-side down) and secure using clamps or 2″ masking tape. It should be taut, but not stretched.
- Smooth your batting over the backing material. If it is very creased, then tumble-dry it on warm for about 20 minutes, and you will find most of the creases have disappeared.
- Smooth your quilt top (right side up) onto the batting.
- Pin the three layers together with quilting safety pins about 4″ (a fist) apart or you can spray baste the three layers together, following the instructions on the can.
- If you need to store your quilt before doing the actual quilting, then roll it rather than fold it.
Quilting
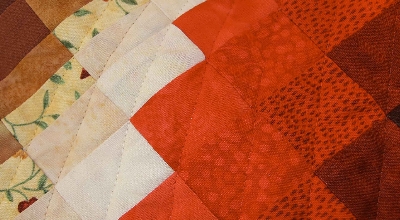
Bargello quilts are often quilted using diagonal lines through the different colours of the quilt. This enhances the curved appearanceThat said I have seen many beautiful Bargellos free motion or long-arm quilted; it is really a matter of taste and time.
-
- Use a walking-foot so that the underside of the quilt does not bunch up.
- Use a stitch length of around 3 to do the quilting.
- Oversew the beginning and end of each line of stitching with very short stitches (length 1) to stop it from coming undone.
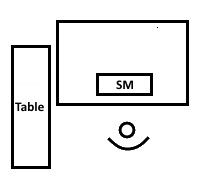
- Ensure that you have a large flat surface to work on. This can be done by sinking the machine into the desk or by adding a false top to the top of a desk.
- Bunch up the quilt on your lap and around the sewing machine, rather than lay it flat. This reduces the drag as you sew.
- A small table or even an ironing board to the left of your sitting position can be useful to take the weight of the quilt.
- Make sure that your elbows are at right angles by choosing a chair that puts you at the right height.
- Take frequent rests.
- Use different coloured threads that match the different colours within the quilt.
- When changing direction, place the point of the change in the middle of a rectangle:

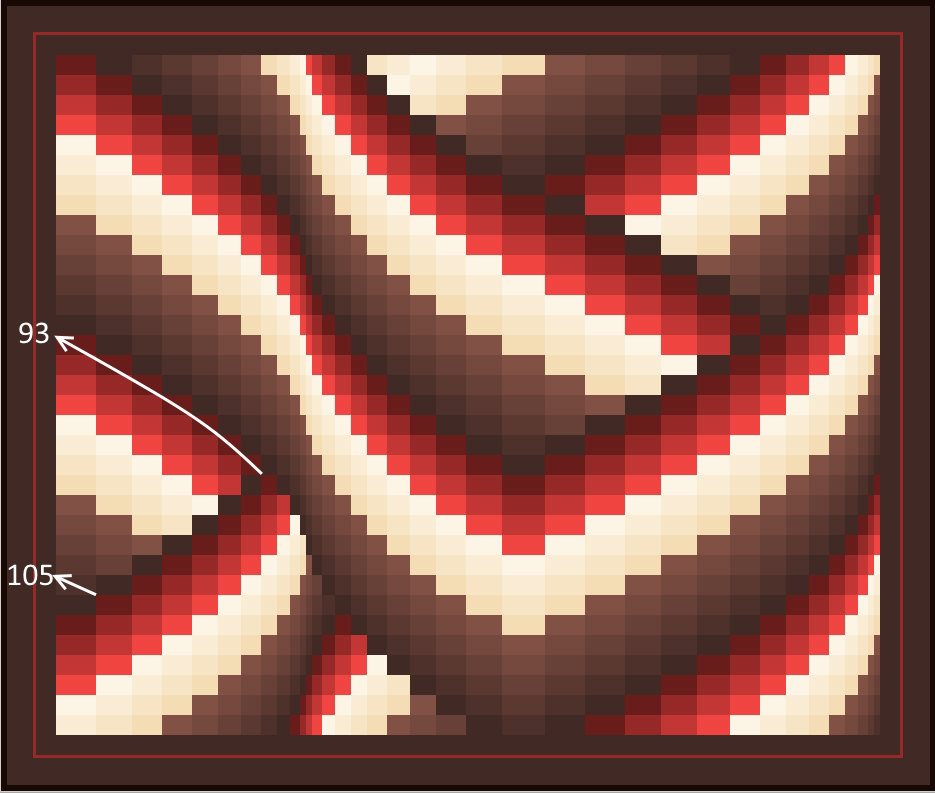
As with all quilting, you need to work from the middle outwards. You must also ensure that you quilt away from all lines already quilted. On the following pages are two examples showing the order in which two quilts were quilted. Example one is an asymmetrical quilt:
Example one, an asymmetrical quilt:
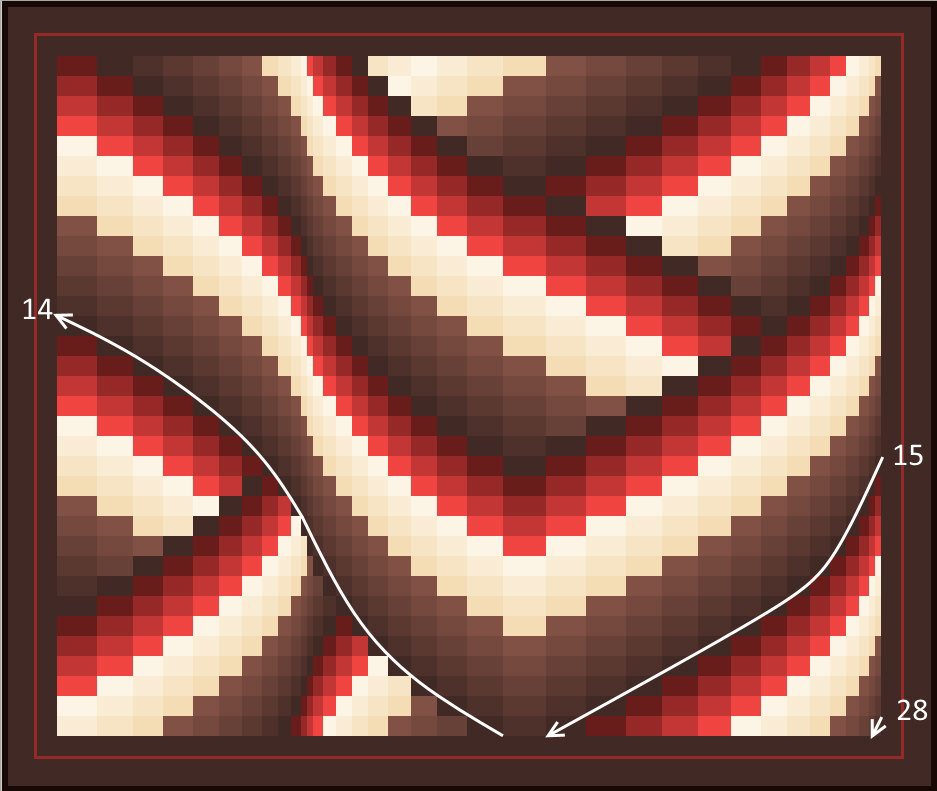
1. Sew lines 1 to 13, in the direction shown.2. Sew line 14 and then lines 15 to 28, in the direction shown.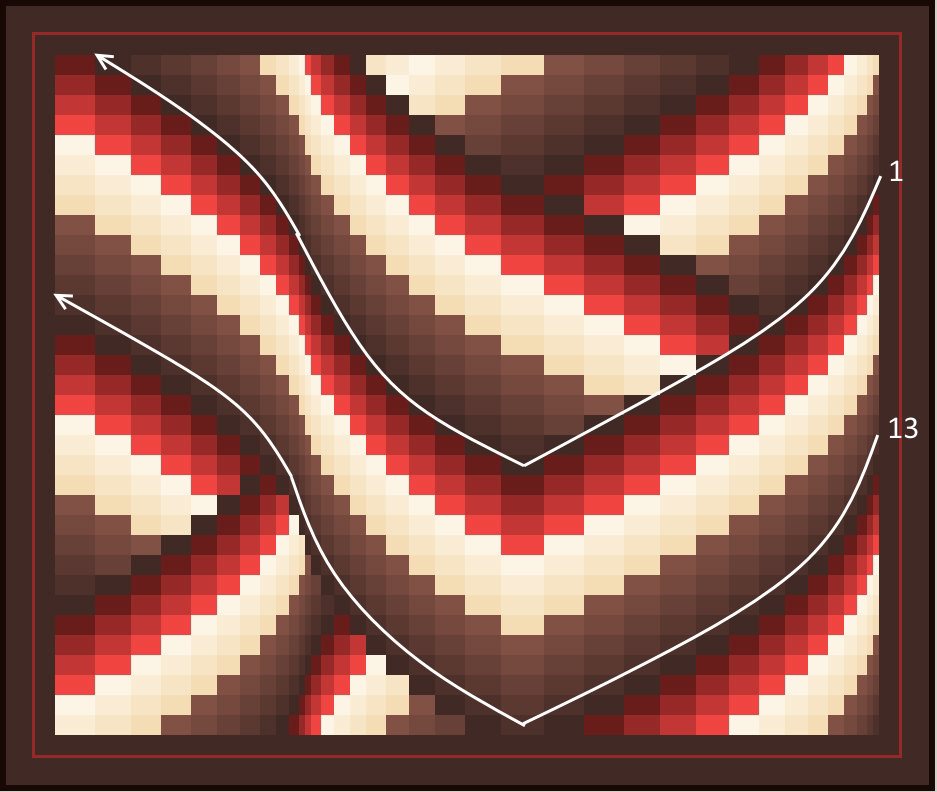
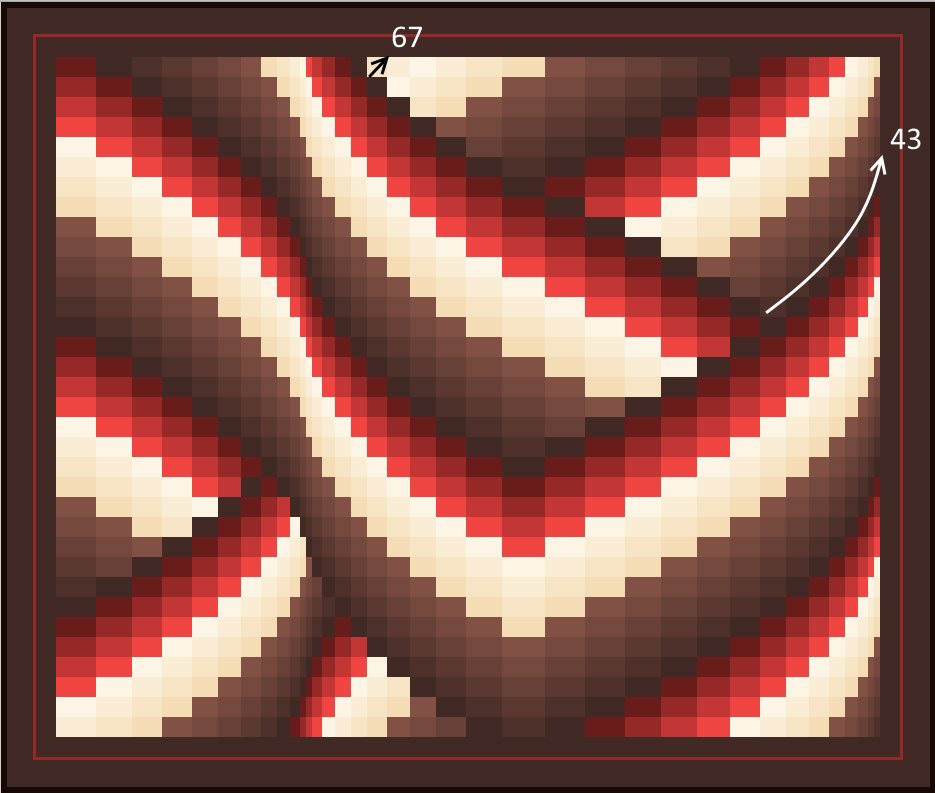
3. Sew lines 29 to 42, in the direction shown.4. Sew lines 43 to 67, in the direction shown.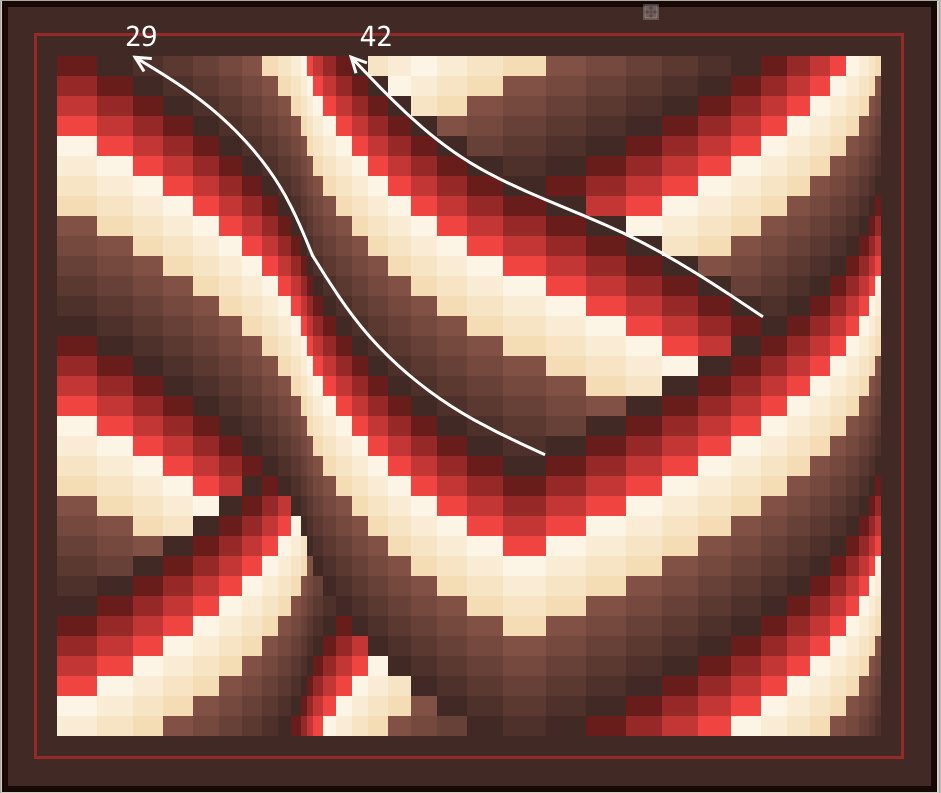
5. Sew lines 68 to 93, in the direction shown.6. Sew lines 94 to 105, in the direction shown.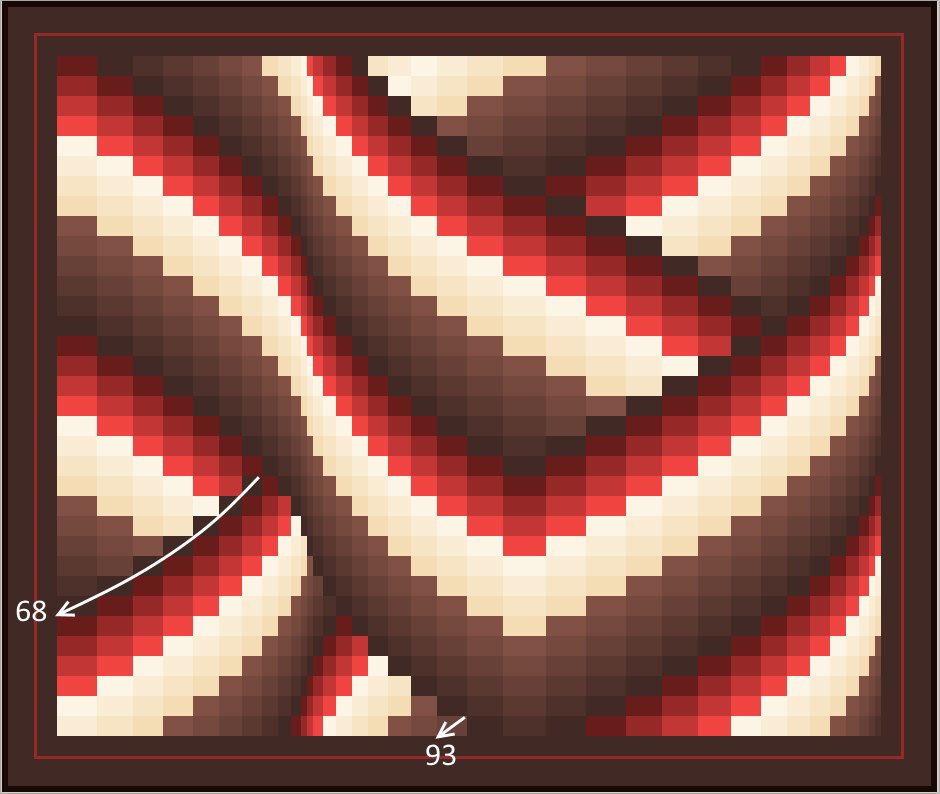
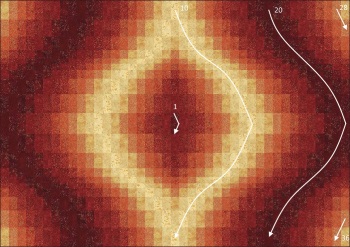
Example two, a symmetrical quilt:
Quilt from the inside half-diamond outwards. Then reverse the quilt and repeat on the other side. Of course, you can work on alternate sides to save having to change the cotton so often.
Quilting the Borders
The borders can be quilted as you please, however here are two suggestions. The first one would be done with a walking foot, and the second one using a free motion foot.
-
- If you have a thin middle border (as in the example on the previous page), then a line of stitching just either side of it can be effective.

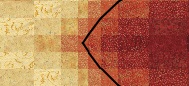
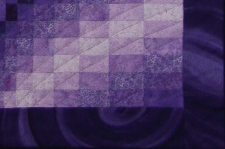
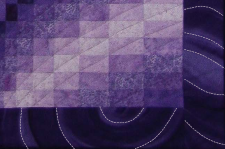
- If the border is patterned, picking out some pieces to outline quilt can be very effective. The image on the right shows suggested quilting lines for this swirly border (using a blending colour).
- If you have a thin middle border (as in the example on the previous page), then a line of stitching just either side of it can be effective.